Search This Blog

Followers

Thursday, November 29, 2018

Jane's attic, update XXXI: a little dresser.

Hi All, here's another completed laser cut kit that I wanted to share with you; this time a  French 'Louis Something' drawer which I'm going to use for the room next to the attic. 


Like the chair kit I shared here before, this one was also produced by Laserville (Melissa's Miniwereld). Of course it was a bit more challenging to build, but I guess it turned out pretty nice, with the weathering and scratches and all!


The drawer knobs are made of metal and were not part of in the kit.


The Gospel, according to Luke Skywalker...

Thanks for visiting, and see you next time!

© José Pereira Torrejón. All rights reserved. No part of the content of this blog may be distributed, published or reproduced without prior authorization from the author.

Monday, November 26, 2018

Jane's attic, update XXX: The stove.

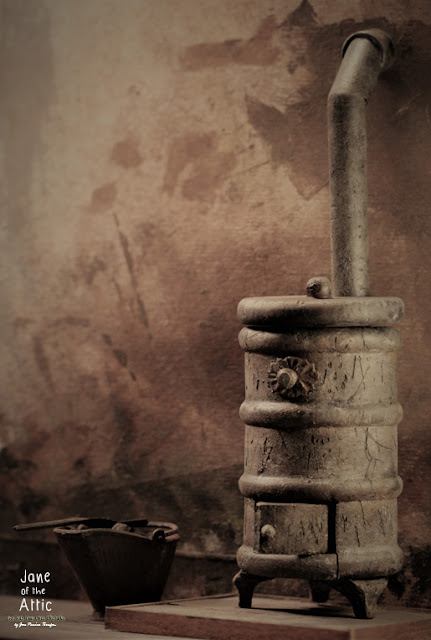
Hi All! Here's another item that I worked on for Jane's attic: an old fashioned stove! It took me a while to 'get it right', and at some point I even stopped working on it for some time, concentrating instead on other items while this one kept 'maturing' in my head. But eventually I pressed on and the result is quite satisfactory, I must say, even surpassing my initial expectations.


Let me show you how the stove looked like when I purchased it, so you can better appreciate its transformation. As you can see in the below image, it was painted in shiny black, very simple, actually.


But then I started working on it, adding more detail and basically turning it into something completely different! 


The coal kit that you see next to the stove in the below pics was added later, after undergoing a similar, radical transformation! Then there is the square of stone tiles which I made for the stove to stand on.


I hope you enjoyed this visual tour; your feedback is always welcome!


Thanks for visiting, and see you next time!

© José Pereira Torrejón. All rights reserved. No part of the content of this blog may be distributed, published or reproduced without prior authorization from the author.

Sunday, November 25, 2018

Jane's attic, update XXIX: a stick horse.

Hi everybody! Today I'm discussing another item in Jane's attic: a stick horse that saw a lot of action as the favorite mount of children through many years of joyful play! 


But let us go back to how it all began: a pretty, snowy white stick horse, looking fresh out of the factory! Below are two images showing the stick horse in its original condition.


Yet, years of playing have changed the little horse. He got weathered, and, if viewed in a certain light, he even looks a little bit... spooky. But that's OK, because the invisible hands of time have given him more 'character', I even dare to say an individuality that he didn't have before. Even the camera loves him so much more now! Besides, the children still play with him, at night, in the old attic...


Thanks for visiting, and see you next time!

© José Pereira Torrejón. All rights reserved. No part of the content of this blog may be distributed, published or reproduced without prior authorization from the author.
Saturday, November 24, 2018

Jane's attic, update XXVIII: a portrait of Rain.

Here's another quick update regarding Jane's attic project. And this one happens to be the result of 'international teamwork' between me and Rebecca Micallef, my friend and fellow-miniaturist of 'My Miniature World' fame.


What you see here is a framed print on canvas of a portrait of Rain, the little ghost girl that is one of my creations, and who I often refer to as 'my daughter'. Rebecca made the print at my request, using a special technique of her own, and sent it to me for framing.
Of course, such a wonderful print asked for a suitable frame. So I worked on a nice frame I had, to make it look more nice still; to make it look really antique! And not satisfied with 'weathering' the front of the frame, I also worked on the back, as you can see in the below image.


The canvas print was stuck to a wooden background which I weathered as well, and fixed in the frame, adding two nails and some wire, just like one would see on a life size frame. And although I know that this will be hidden from view, I felt I needed to do it anyway. Leaving the back untreated just because it won't be seen was simply not an option! I must say I'm very happy with the way it turned out, and I hope you think the same!


Thanks for visiting, and see you next time....! 

© José Pereira Torrejón. All rights reserved. No part of the content of this blog may be distributed, published or reproduced without prior authorization from the author.

Friday, November 23, 2018

Black Friday 2018.

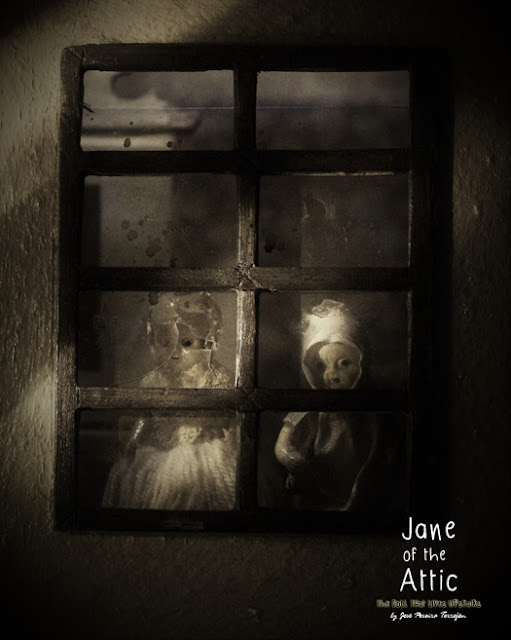
Black Friday has a totally different meaning for Jane and the Baby... Below is a pic of them looking out of a window in their big, old house. Outside the night reigns supreme, as the shadows cast light on more shadows, previously unseen. The air carries the cool, bitter-sweet breath of the swamp, mixed with the sound of the precious whip-poor-wills that live in the woods nearby... Enjoy your day, while it lasts!


If you're curious to know how a whip-poor-will sounds like, please click here.

Thanks for visiting, and see you next time....! 

© José Pereira Torrejón. All rights reserved. No part of the content of this blog may be distributed, published or reproduced without prior authorization from the author.

Thursday, November 22, 2018

Jane's attic, update XXVII: a well-worn chair.

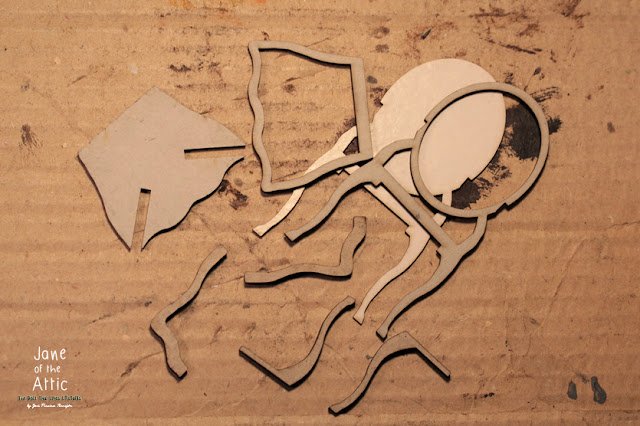
Today I'm sharing another finished small project, this time a 'Louis Something' chair that came as a laser cut kit from Melissa's Miniwereld, and which will find a place to live in Jane's attic. The below image shows the kit after unpacking.


I must say I like Melissa's kits, and after having bought several of them I already became familiar with their distinctive, sweet aroma of burned cardboard, that greets you as soon as you open the package. It ranks high on the list of my favorite aroma's, together with petrol, coffee, burned rubber, and a few others that I really cannot discuss here.


Anyway, the kit was easily assembled, although it took me some time to digest the written instructions, but that's just me being more acquainted with Ikea and Kinder Bueno Surprise egg assembly manuals. The above pic shows the assembled chair, minus the upholstery and painting, which is at one's own discretion. Of course at this point I could have chosen to leave the chair looking like the seat of an old German war plane, but that would be too easy. So I decided to work on it, making it look very nice first, then ravishing it completely to make it suitable for the attic.


And here is the end result! I must admit that the backrest looks as if the chair was used by someone carrying a chainsaw on his back, but I guess that's the beauty of it. You may also note that one of the front legs seems to be a half millimeter shorter than the rest, but any wobbling can be easily solved using a miniature beer mat! In any case, I do hope that you like it!


Thanks for visiting, and see you next time!

© José Pereira Torrejón. All rights reserved. No part of the content of this blog may be distributed, published or reproduced without prior authorization from the author.

Monday, November 19, 2018

Metal lever make-over.

got my hands on a metal lever, to be used for a bathroom. The thing looked quite 'cheap' and ugly, to be honest, painted in a bright golden color which hurt my eyes. This made me wonder if, instead of the usual protective glasses, I should be using sunglasses while working on it!

First thing I drilled a hole in the lever's handle, then removed the 'knob' on it, because I thought it was 'too much', and sprayed everything with a coat of primer. The hole was meant to sustain a chain hanging from it. Drilling it was particularly challenging, as the metal was very hard, and the object very small and 'slippery'. But, in the end, I managed to do it without sustaining any wounds, resulting in the below image.


Then I applied several layers of paint, to make it look weathered and corroded, as you can see in the image below. I hope you like the little metamorphosis!


Below are some images of the lever and the chain hanging in place. The cistern and toilet bowl -which are made of metal and wood- I purchased 'pre-owned', and although they will need a tiny bit of additional weathering, they already look very cool (never thought I would ever say that sanitation looks 'cool', but ok), specially now that it's complete with a nice lever and chain (which look cool as well!). They will be used in a future project.


Thanks for visiting and see you next time!

© José Pereira Torrejón. All rights reserved. No part of the content of this blog may be distributed, published or reproduced without prior authorization from the author.