Search This Blog

Followers

Sunday, December 16, 2018

Jane's attic, update XXXVI: the staircase to the attic.

Hi Everybody!

Today I'm discussing quite a 'big' project I've been working on: the staircase that leads to Jane's attic.


Considering that the attic is a 'stand alone' project of sorts, with no rooms underneath it, at least for now, adding a staircase seems rather redundant. I could have settled for a much more simple solution, like leaving it staircase out altogether. But, as always, I don't like to opt for 'shortcuts', preferring instead to invest time and effort in something that may not even be seen. So I went for the stairs, and to be honest, I'm pretty sure I'll end up using them in attic photo shoots and stories anyway!


The first thing I got my hands on was the banister at the top of the stairs. Since I wanted the posts to be stuck firmly to the floor, I glued wooden slats around the opening of the staircase, then drilled holes to stick the posts in and glued them as well.


The main posts got extra attention as well, to ensure a sturdier adhesion to the floor. To this end, I drilled holes in the floor and placed pins underneath them.


The below two images show the end result. Note that the railing was painted in two colors to give it that extra 'touch'.


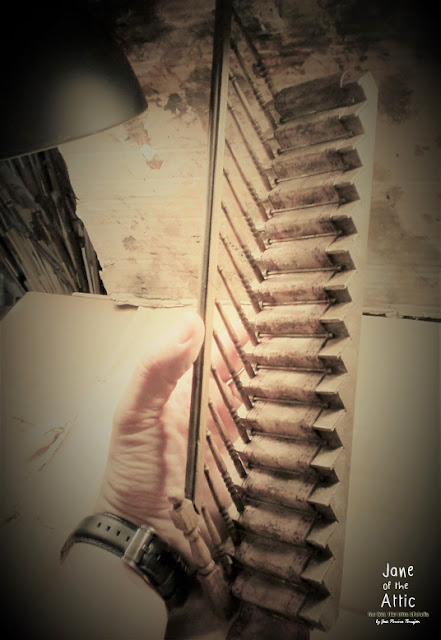
Now, the banister was the relatively 'easy' part of the project. Once completed, the next step was to start working on the stairs. I had never done anything like it, so it was a lot of trial and error involved. Below is how the stairs looked originally.


I glued the parts together, applied some layers of English wax to them, and went on to attach the rods that would hold the stair tapestry in place, then weathered them.


Those rods were a bit of a pain in the eye to do, and quite time consuming. But, as is always the case when one finally completes such a tedious task, the results make one feel like it was totally worth the effort!


The tapestry was subsequently applied. Note that there was no glue used in the process. The carpet was carefully slid under the rods that keep it in place. This gives the stairs a more genuine appearance, as the carpet looks somewhat 'loose' here and there, which it actually is!


Then came the placing of the posts, and the weathering of the carpet, which for me is the part that is most fun! Below is a selection of images showing the final result.


All things considered, this project turned out pretty well. It was a hell of a job to do, but the result is quite satisfactory. I mean, wow, I completed my first staircase!


A big thanks goes to Rebecca Micallef again, for guiding me through the process with her invaluable help and advice!


Thanks for visiting, and see you next time!

© José Pereira Torrejón. All rights reserved. No part of the content of this blog may be distributed, published or reproduced without prior authorization from the author.

Friday, December 14, 2018

Jane's attic, update XXXV: an oil lamp.

Today I'm discussing a very cute, little oil lamp for Jane's attic. Measuring less than 4 cm (1.5 inches) tall, this 1:12 scale beauty didn't arrive looking anything like the way you see it here.

The oil lamp standing on the French dresser.
For starters, the lamp's font (the 'body') was painted in a very cheesy yellow color, and didn't have a wick regulator, let alone a wick (the lamp's 'fuse'). So I added these and painted the font using various color layers, including some green coloring suggesting brass corrosion.


The chimney consisted of a piece of massive plastic that made the lamp look very unrealistic.  I changed that by hollowing it out with my multi-tool, an extremely delicate process which required surgical precision, as one wrong move would destroy the chimney! Luckily, the material proved quite resistant, so I managed to achieve my goal. The below pics are a tribute to the humble, yet gorgeous oil lamp. It offers close-up views of its key elements for you to enjoy!

The oil lamp with its chimney next to it.
The upper part of the font, with the added burner, the wick, and wick regulator.


Thanks for visiting, and see you next time!

© José Pereira Torrejón. All rights reserved. No part of the content of this blog may be distributed, published or reproduced without prior authorization from the author.

Sunday, December 9, 2018

Jane's attic, update XXXIV: a statuette of the Virgin Mary.

Jane's attic holds many singular items under its battered roof; items that, at some point, had a special meaning to the residents of the big, old house. With them, it has become a veritable museum of curiosities.


One of the more remarkable ones is a beautiful statuette of the Virgin Mary. No-one can say how long it has been there, or explain the many dents and cracks it shows. Nor can anyone say why at a certain point it was moved to the attic.
What can be said, though, is that neither the passage of time, nor the sustained 'bruises' have diminished her beauty. Pious and dignified she stands, perhaps protecting the house against some unknown evil...


Thanks for visiting, and see you next time!

© José Pereira Torrejón. All rights reserved. No part of the content of this blog may be distributed, published or reproduced without prior authorization from the author.

Thursday, December 6, 2018

Jane's attic, update XXXIII: a trunk full of books.


Hi everybody, I hope you're all well! Today I'm going to share with you another addition to Jane's attic: a trunk full of wonderful miniature books!


The trunk was a 'ready made' which I bought at a miniatures fair, and then weathered to smithereens. When I was done, the poor thing did look like something completely different, but much more suitable for the attic! Below are several pictures of it after the weathering, including some showing my hand for measurement (all you need to remember is that I have BIG hands, ok..?).


Then I worked on the books, or rather non-assembled book kits, which I got from the lovely Rebecca Micallef. She has a whole collection of close to 100 different titles featuring beautiful, famous (and less famous) vintage books which she adapted for miniatures. Some of the books are Victorian, while others are a bit more modern.


The books come as kits (see above image), and are faithful reproductions of the originals. And the great thing about them, is that you can actually read them!! They are available at her web shop in two scales (1:12, and 1:24), and are a joy to read. They even are numbered on their spine, so you can actually start your own collection! 
For those unsure how to start (like me), she offers a tutorial on her "My Miniature World" blog. Finally, those who want to collect the books but don't want to spend time putting them together, can order them 'ready made'. I chose for the kit format, because I wanted to experience the thrill of 'creating' a book, and ended up doing five!


This image and below: a peek inside "The 3 Little Kittens", 1:12 scale.


The 5 books in the trunk are: "The Circus Procession", "The 3 Little Kittens", "The Story of Miss Moppet", "The Book of Dragons", and "The Gargoyle Book". Once they were done, I put them in the trunk, and presto!


This image and below: a peek inside "The book of Dragons".


This image: a peek inside "The Story of Miss Moppet"


Below are some photo's of how it all looks like now. I'm so thrilled with them, that I will definitely add more!  In fact, I'll use the 1:24 version of some of these books for my "Sad Kitten" project! Thank you, Rebecca, for your patience and guidance! And, of course, for the lovely books!


Thanks for visiting, and see you next time!

© José Pereira Torrejón. All rights reserved. No part of the content of this blog may be distributed, published or reproduced without prior authorization from the author.

Sunday, December 2, 2018

Jane's attic, update XXXII: a pelmet and lace curtains for the attic window.

Sometimes, just when you think you're all 'done' with something, a sudden, fresh look at it reveals that there's still room for improvement! This happened to me when, looking at the attic window with the shutters, it struck me as being a little bit too bare, when viewed from the inside. 


So I decided to correct this by adding a pelmet and lace curtains to it, as well as a short, tattered curtain on top to finish it off. 


The pelmet was built from scratch; and the short curtain, as well as the lace curtains, were dyed to make them look old and weathered. An interesting detail to mention here, is the way the lace curtains were dyed. After soaking them in a specially prepared paint mix, I left them to dry overnight. The next morning, I was surprised to see a very strange, yet incredibly effective color pattern on them. It was never my intention to make them look like this, yet I totally love the way they turned out! It is as if an invisible hand dyed them overnight, making them perfect for the ghostly attic!


Thanks for visiting, and see you next time!

© José Pereira Torrejón. All rights reserved. No part of the content of this blog may be distributed, published or reproduced without prior authorization from the author.